Azure Container Instances Worker Guide
Why use ACI for flow run execution?
ACI (Azure Container Instances) is a fully managed compute platform that streamlines running your Prefect flows on scalable, on-demand infrastructure on Azure.
Prerequisites
Before starting this guide, make sure you have:
- An Azure account and user permissions for provisioning resource groups and container instances.
- The
azureCLI installed on your local machine. You can follow Microsoft's installation guide. - Docker installed on your local machine.
Step 1. Create a resource group
Azure resource groups serve as containers for managing groupings of Azure resources.
Replace <resource-group-name> with the name of your choosing, and <location> with a valid Azure location name, such aseastus.
export RG_NAME=<resource-group-name> && \
az group create --name $RG_NAME --location <location>
Throughout the rest of the guide, we'll need to refer to the scope of the created resource group, which is a string describing where the resource group lives in the hierarchy of your Azure account. To save the scope of your resource group as an environment variable, run the following command:
RG_SCOPE=$(az group show --name $RG_NAME --query id --output tsv)
You can check that the scope is correct before moving on by running echo $RG_SCOPE in your terminal. It should be formatted as follows:
/subscriptions/<subscription-id>/resourceGroups/<resource-group-name>
Step 2. Prepare ACI permissions
In order for the worker to create, monitor, and delete the other container instances in which flows will run, we'll need to create a custom role and an identity, and then affiliate that role to the identity with a role assignment. When we start our worker, we'll assign that identity to the container instance it's running in.
1. Create a role
The custom Container Instances Contributor role has all the permissions your worker will need to run flows in other container instances. Create it by running the following command:
az role definition create --role-definition '{
  "Name": "Container Instances Contributor",
  "IsCustom": true,
  "Description": "Can create, delete, and monitor container instances.",
  "Actions": [
    "Microsoft.ManagedIdentity/userAssignedIdentities/assign/action",
    "Microsoft.Resources/deployments/*",
    "Microsoft.ContainerInstance/containerGroups/*"
  ],
  "NotActions": [
  ],
  "AssignableScopes": [
    '"\"$RG_SCOPE\""'
  ]
}'
2. Create an identity
Create a user-managed identity with the following command, replacing <identity-name> with the name you'd like to use for the identity:
export IDENTITY_NAME=<identity_name> && \
az identity create -g $RG_NAME -n $IDENTITY_NAME
We'll also need to save the principal ID and full object ID of the identity for the role assignment and container creation steps, respectively:
IDENTITY_PRINCIPAL_ID=$(az identity list --query "[?name=='$IDENTITY_NAME'].principalId" --output tsv) && \
IDENTITY_ID=$(az identity list --query "[?name=='$IDENTITY_NAME'].id" --output tsv)
3. Assign roles to the identity
Now let's assign the Container Instances Contributor role we created earlier to the new identity:
az role assignment create \
    --assignee $IDENTITY_PRINCIPAL_ID \
    --role "Container Instances Contributor" \
    --scope $RG_SCOPE
Since we'll be using ACR to host a custom Docker image containing a Prefect flow later in the guide, let's also assign the built in AcrPull role to the identity:
az role assignment create \
    --assignee $IDENTITY_PRINCIPAL_ID \
    --role "AcrPull" \
    --scope $RG_SCOPE
Step 3. Create the worker container instance
Before running this command, set your PREFECT_API_URL and PREFECT_API_KEY as environment variables:
export PREFECT_API_URL=<PREFECT_API_URL_HERE> PREFECT_API_KEY=<PREFECT_API_KEY_HERE>
Running the following command will create a container instance in your Azure resource group that will start a Prefect ACI worker. If there is not already a work pool in Prefect with the name you chose, a work pool will also be created.
Replace <work-pool-name> with the name of the ACI work pool you want to create in Prefect. Here we're using the work pool name as the name of the container instance in Azure as well, but you may name it something else if you prefer.
az container create \
    --name <work-pool-name> \
    --resource-group $RG_NAME \
    --assign-identity $IDENTITY_ID \
    --image "prefecthq/prefect:2-python3.11" \
    --secure-environment-variables PREFECT_API_URL=$PREFECT_API_URL PREFECT_API_KEY=$PREFECT_API_KEY \
    --command-line "/bin/bash -c 'pip install prefect-azure && prefect worker start --pool <work-pool-name> --type azure-container-instance'"
This container instance uses default networking and security settings. For advanced configuration, refer the az container create CLI reference.
Step 4. Create an ACR registry
In order to build and push images containing flow code to Azure, we'll need a container registry. Create one with the following command, replacing <registry-name> with the registry name of your choosing:
export REGISTRY_NAME=<registry-name> && \
az acr create --resource-group $RG_NAME \
  --name <registry-name> --sku Basic
Step 5. Update your ACI work pool configuration
Once your work pool is created, navigate to the Edit page of your ACI work pool. You will need to update the following fields:
Identities
This will be your IDENTITY_ID. You can get it from your terminal by running echo $IDENTITY_ID. When adding it to your work pool, it should be formatted as a JSON array:
["/subscriptions/<subscription-id>/resourcegroups/<resource-group-name>/providers/Microsoft.ManagedIdentity/userAssignedIdentities/<identity-name>"]

ACRManagedIdentity
ACRManagedIdentity is required for your flow code containers to be pulled from ACR. It consists of the following:
- Identity: the same
IDENTITY_IDas above, as a string/subscriptions/<subscription-id>/resourcegroups/<resource-group-name>/providers/Microsoft.ManagedIdentity/userAssignedIdentities/<identity-name> - Registry URL: your
<registry-name>, followed by.azurecr.io<registry-name>.azurecr.io

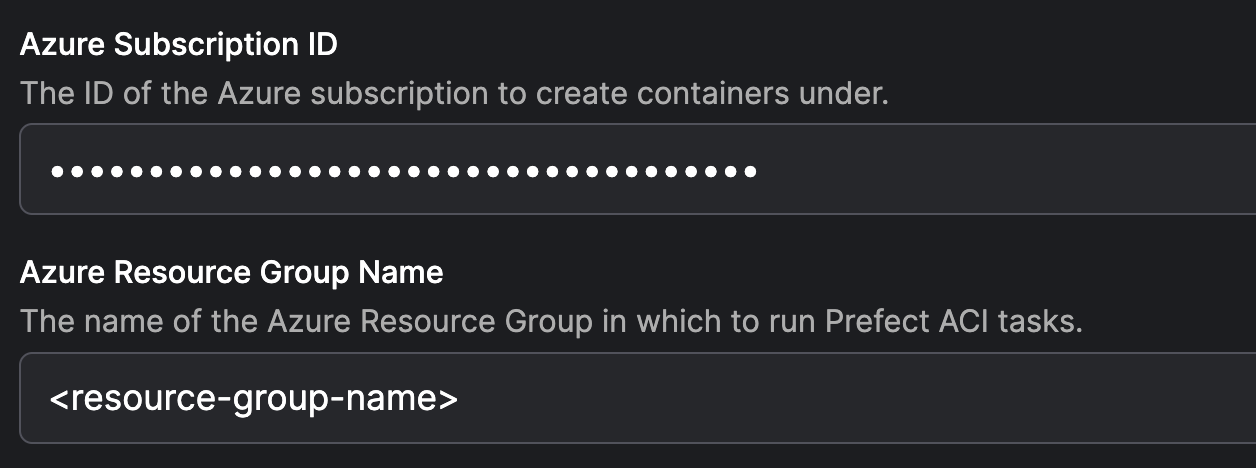
Subscription ID and resource group name
Both the subscription ID and resource group name can be found in in the RG_SCOPE environment variable created earlier in the guide. View their values by running echo $RG_SCOPE:
/subscriptions/<subscription-id>/resourceGroups/<resource-group-name>
Then click Save.
Step 6. Pick up a flow run with your new worker
This guide uses ACR to store a Docker image containing your flow code. Write a flow, then deploy it using flow.deploy(), which will copy flow code into a Docker image and push that image to an ACR registry.
1. Log in to ACR
Use the following commands to log in to ACR:
TOKEN=$(az acr login --name $REGISTRY_NAME --expose-token --output tsv --query accessToken)
docker login $REGISTRY_NAME.azurecr.io --username 00000000-0000-0000-0000-000000000000 --password-stdin <<< $TOKEN
2. Write and deploy a simple test flow
Create and run the following script to deploy your flow. Be sure to replace <registry-name> and <work-pool-name> with the appropriate values.
my_flow.py
from prefect import flow, get_run_logger
from prefect.deployments import DeploymentImage

@flow
def my_flow():
    logger = get_run_logger()
    logger.info("Hello from ACI!")

if __name__ == "__main__":
    my_flow.deploy(
        name="aci-deployment",
        image=DeploymentImage(
            name="<registry-name>.azurecr.io/example:latest",
            platform="linux/amd64",
        ),
        work_pool_name="<work-pool-name>",
    )